This tutorial assumes that you already have Braintel Connection and a Nimbuzz app installed in your phone. I have used Nimbuzz on Samsung Galaxy Mini ( Android 2.3.5) to create screenshots for this tutorial. If you have different phone then some options might be different on your phone but you can easily find appropriate options once you have gone through this tutorial.
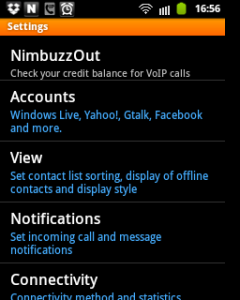
1. Now open Nimbuzz on your phone and navigate to Menu > Settings
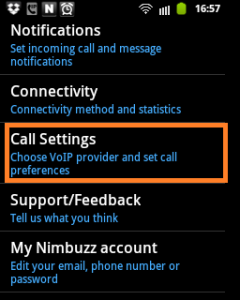
2. Scroll down Nimbuzz settings page to find Call Settings
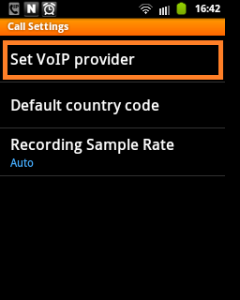
3. Select “Set VoiP Provider”
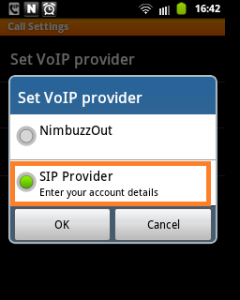
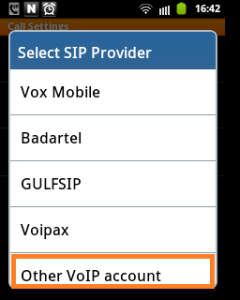
4. Select “SIP Provider” and you will see another screen with list of various VoIP providers. If screen doesn’t show up , once select NimbuzzOut and then again select “SIP Provider” option, next screen will show up.
5. From the list of VoIP providers , you will need to select “Other VoIP Account” option.
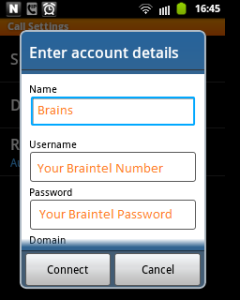
6. You can enter anything in Name field , I preferred using “Brains”. Next enter your number in Username field and Password in password field. You can find your number and password in original email you received from BrainTel when you purchased your connection.
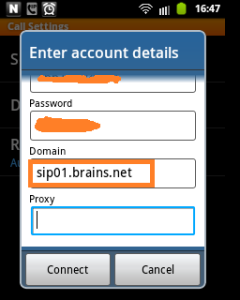
7. Last thing you need to enter is “sip01.brains.net” in Domain field . You don’t need to enter anything in Proxy field. Now press the Connect button and if you followed instructions carefully , your Nimbuzz should now be connected to Braintel.
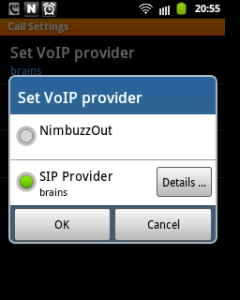
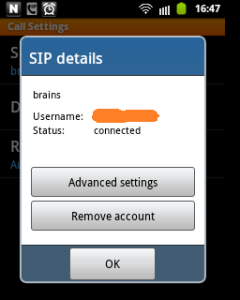
8. You can verify your connection status in Nimbuzz Menu > Settings > Call Settings > Set VoIP Provider > Press “Details”
9. You will now see the status of your Braintel connection. Now find the Dialer in your Nimbuzz and start making calls.
Thanks brother, it is working on Galaxy S2 also.
Yaar, how to buy this ? how much does it cost?